5 Steps to Amazon Selling Success
Key Takeaways
Ensure that your personal and business details match exactly with your verification documents.

Requirements to Create an Amazon Seller Account
They do not need to be in the same country as the business.3. Business Verification Documents
Different types of businesses require different documents.
4. Business Address and Phone Number
This consistency is crucial for verification purposes.
5. Business Bank Account
If you are not operating as an individual, provide your business bank account details. This account is where Amazon will deposit your payments. Ensure it matches your business location for smooth transactions.
When setting up your Amazon seller account, providing accurate business bank account details is a critical step. This account is where Amazon will deposit your earnings, so it must be correctly linked to your business. Here’s a detailed look at why this step is so important and how to ensure it’s done correctly.
Importance of a Business Bank Account
Requirements and Accuracy
Matching Business Location
Individual vs. Professional Amazon Seller Accounts
Individual Account
Add new products to the catalog.
Use Fulfillment by Amazon (FBA).
Sell in a few categories.
Drawbacks:
Limited access to advanced selling tools.
Cannot apply for top placements on product pages.
No option for bulk listing creation or inventory management tools.
Professional Account
Features:
Utilize bulk listing creation and inventory management tools.
Apply for top placements and on-site advertising.
Run promotions and offer free shipping.
Drawbacks:
Five Major Steps to Create an Amazon Seller Account
Follow these steps to set up your Amazon seller account without complications:
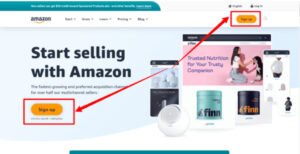
Stage #1: Sign Up
Start by visiting the Amazon Seller sign-up page. Here, you will create your account and enter your details. Make sure to use accurate information to avoid delays.
Stage #2: Provide Business Information
Be precise with the information you provide. Any inconsistencies can cause verification issues.
Stage #3: Upload Verification Documents
Submit the necessary documents for verification. This typically includes identification for the primary contact and business registration documents.
Stage #4: Set Up Your Bank Account
Enter your business bank account details. This account will be used for receiving payments from Amazon.
Stage #5: Choose Your Selling Plan
Decide whether to go with an Individual or Professional seller account.
Incorrect Bank Details
Choosing the Wrong Selling Plan
On the other hand, a Professional Seller Account is ideal for larger businesses or those with growth aspirations. It enables sellers to run promotions and qualify for top placements, which can significantly boost visibility and sales.
Failing to choose the appropriate plan can lead to operational inefficiencies and financial strain. For example, a seller opting for an Individual Plan while handling large volumes may end up paying excessive per-item fees. Similarly, small-scale sellers choosing a Professional Plan may incur unnecessary costs without utilizing its advanced features.
To make the right choice, evaluate factors like the volume of items you plan to sell, your marketing strategy, and long-term goals. Carefully weigh the benefits against the costs of each plan. Keep in mind that Amazon allows sellers to switch plans as their business needs evolve. Making an informed decision upfront will help you maximize your potential on Amazon while avoiding the pitfalls of an ill-suited plan.
Conclusion
Creating an Amazon seller account can be straightforward if you prepare in advance. Gather all necessary documents, choose the right account type, and carefully follow each step. By avoiding common mistakes, you’ll set yourself up for success in the Amazon marketplace.This guide is designed to help you navigate the account creation process smoothly. With careful preparation and attention to detail, you’ll be ready to start selling on one of the world’s largest online platforms.


